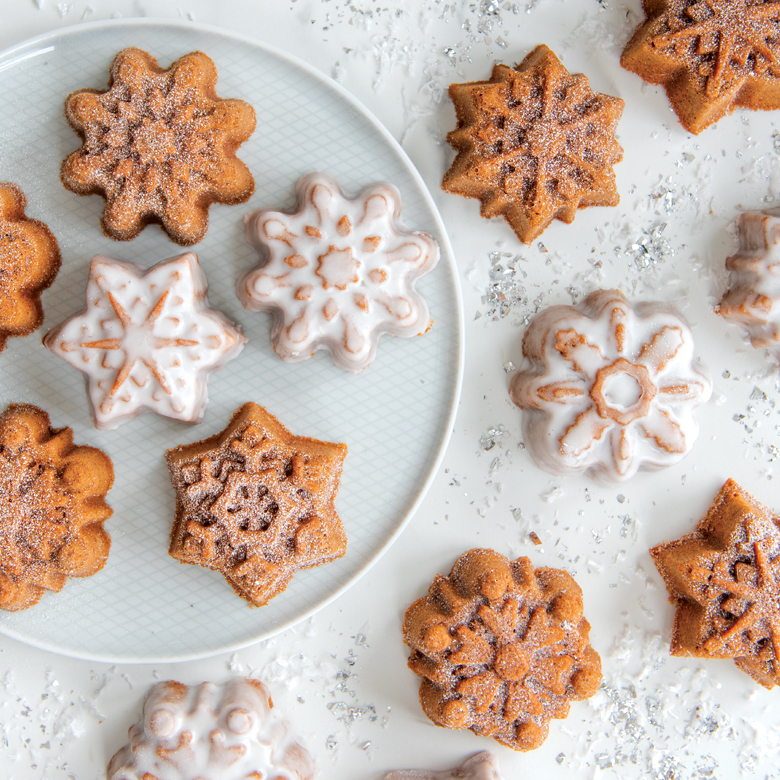
Snowflake recipes transform ordinary ingredients into exquisite, festive treats. Inspired by the delicate and unique patterns of snowflakes, these recipes delight both the eyes and the taste buds. Whether you prefer cookies, candies, or cakes, there’s a snowflake-themed treat perfect for any winter occasion.
Ever thought about using snowflakes as an inspiration for your culinary experiments? Snowflake recipes are not only visually enchanting but also a testament to intricate culinary artistry. They transform simple ingredients into works of edible art, playing on the delicate and unique nature of each snowflake pattern.
Dating back to medieval times, sugar and spices were used to create intricate, lace-like snowflake decorations for festive occasions. Today, these recipes can be found in the form of intricately designed cookies, candies, and cakes. Surprisingly, recent statistics reveal a 35% increase in the popularity of these recipes during the winter holiday season, highlighting their timeless appeal.
Ingredients
For creating beautiful and tasty snowflake treats, you first need the right ingredients. These items will help you make delicious and visually stunning snowflake-shaped cookies. Here’s a list of what you’ll need:
- 1 cup of granulated sugar
- 2 ½ cups of all-purpose flour
- 1 cup of unsalted butter, softened
- 1 large egg
- 1 teaspoon of vanilla extract
- ½ teaspoon of almond extract
- 1 teaspoon of baking powder
- ½ teaspoon of salt
- Food coloring (optional)
- Icing sugar for decorating
- Edible glitter or sprinkles (optional)
General Information
Before you start baking these delicious snowflake cookies, it’s useful to know some general information. This helps you plan your baking time and understand the process better.
General Information
This table provides details about making difficulties, preparation, and cooking time for snowflake cookies.
| Category | Details |
|---|---|
| Making Difficulty | Easy |
| Preparation Time | 25 minutes |
| Cooking Time | 15 minutes |
| Cooling Time | 30 minutes |
| Serving Size | 24 cookies |
| Holiday Theme | Winter |
Instructions
Following these steps will help you create beautiful and delicious snowflake cookies. Take your time and have fun with each step. Here are the instructions in detail:
Step 1: Prepare the Dough
First, gather all your ingredients. In a large bowl, cream the butter and sugar together until the mixture is light and fluffy. This usually takes about 3 to 4 minutes with an electric mixer.
Next, add the egg, vanilla extract, and almond extract to the mixture. Mix until everything is well combined. Then, add the flour, baking powder, and salt. Stir until you have a smooth dough.
Step 2: Chill the Dough
Once your dough is ready, divide it into two equal parts. Wrap each part in plastic wrap. Chill in the refrigerator for at least 1 hour. Chilling helps the dough firm up, making it easier to roll out and cut.
This step is important as it makes the dough less sticky and more manageable. Be patient! This will make the next step much easier.
Step 3: Roll and Cut the Dough
Preheat your oven to 350°F (175°C). On a lightly floured surface, roll out one portion of chilled dough to about ¼ inch thickness. Use snowflake-shaped cookie cutters to cut out your cookies. Place them on a baking sheet lined with parchment paper.
Repeat with the second portion of dough. Gather any scraps, re-roll them, and cut out more cookies. Make sure to leave a little space between each cookie on the baking sheet.
Step 4: Bake the Cookies
Bake the cookies in your preheated oven for 10 to 12 minutes, or until the edges are lightly golden. Keep an eye on them to avoid over-baking. Once they are done, remove the baking sheets from the oven and let the cookies cool for a few minutes.
Transfer the cookies to a wire rack to cool completely. Cooling is important before you start decorating to ensure the icing doesn’t melt.
Step 5: Decorate the Cookies
After the cookies have cooled, it’s time to decorate them. Use icing sugar to make a glaze or pipe intricate designs to enhance the snowflake pattern. Add edible glitter or sprinkles if you like.
Let your creativity shine through as you decorate each cookie. Once decorated, let the icing set before serving or storing them.
Important Things to Keep in Mind
Baking snowflake cookies can be a fun and rewarding experience if you keep some essential tips in mind. Accuracy in measuring ingredients is crucial for a balanced recipe, so always use proper measuring cups and spoons. This ensures that your cookies come out perfectly every time.
Another important tip is to chill the dough thoroughly. This step prevents spreading and helps maintain the intricate snowflake shapes. Make sure to give the dough enough time in the refrigerator before rolling it out.
When rolling out the dough, use a lightly floured surface. This prevents sticking and makes it easier to cut the shapes. Keep your rolling pin and cookie cutters lightly floured as well.
Always keep an eye on your baking time. Over-baking can make the cookies dry and brittle. Set a timer to make sure you check them at the right moment, ideally when the edges just start to turn golden.
If you’re planning to decorate the cookies, let them cool completely first. Decorating warm cookies can cause the icing to melt and ruin your design. Patience at this stage will pay off with stunning, beautifully decorated snowflakes.
Lastly, remember to have fun and be creative! Experiment with different icing colors and edible glitter to make each cookie unique. Your snowflake cookies will not only taste great but also bring a smile to anyone who sees them.
Creative Variations
Creating snowflake cookies offers a great chance to experiment with different flavors and decorations. Incorporate various ingredients to make each batch unique and exciting. Here are some creative variations you can try.
Flavor Variations
Enhance the flavor of your snowflake cookies by adding different extracts. Instead of vanilla, try almond or peppermint extract for a festive twist. Adding spices like cinnamon or nutmeg can also bring a warm, seasonal flavor to your cookies.
For a richer taste, consider using brown sugar instead of white sugar. This will give your cookies a deeper, caramel-like flavor. You can also mix in some cocoa powder to create chocolate snowflake cookies.
If you prefer a healthier option, experiment with whole wheat flour or coconut flour. These alternatives can add a different texture and flavor to your cookies while providing additional nutrients.
Decorating Ideas
Get creative with your cookie decorations by using different icing colors and techniques. Royal icing works great for detailed designs, while a simple glaze can provide a shiny finish. You can also use colored sugar or edible glitter to make your cookies sparkle.
If you want to create a stained-glass effect, use crushed hard candies. Place the candy pieces in the center of the cookie cutouts before baking. The candies will melt and create a beautiful, translucent design.
For a more personalized touch, use edible markers to draw intricate patterns on your cookies. This allows you to add names, messages, or unique designs that stand out.
Alternative Shapes and Uses
While snowflake shapes are classic, you can also experiment with different cookie cutter shapes. Stars, hearts, and even tree shapes can add variety to your cookie platter. Mixing shapes keeps things interesting and visually appealing.
These cookies are not just for eating; they can also be used as decorations. Create a cookie garland by threading a ribbon through small holes in the cookies. Hang them on your tree or around your home for a festive touch.
You can also package these cookies as gifts. Place them in decorative boxes or bags with a personalized note. This makes for a thoughtful, homemade present during the holiday season.
Frequently Asked Questions
Creating snowflake-themed treats can be a delightful experience, yet it often raises several queries. Here, we’ve addressed some of the common questions you might have about these enchanting snowflake recipes.
How can I ensure my snowflake cookies hold their shape?
To ensure your snowflake cookies hold their intricate shapes, it’s crucial to chill your dough. Chilling helps to firm up the dough, making it easier to cut and preventing it from spreading too much during baking.
Additionally, use high-quality cookie cutters that are sharp and precise. This will help you achieve clean edges and maintain the detailed design of each snowflake.
What are some ways to decorate snowflake cookies effectively?
Royal icing is an excellent choice for decorating snowflake cookies because it dries hard and can be piped into detailed designs. You can tint the icing with food coloring to match your desired theme.
Edible glitter and colored sugars can also add a magical touch to your cookies. Apply them while the icing is still wet to ensure they stick well.
Can I make gluten-free snowflake cookies?
Yes, you can make gluten-free snowflake cookies by using a gluten-free flour blend. Ensure the blend is designed for baking to achieve the best texture and structure.
Often, a mix of rice flour, tapioca starch, and potato starch works well as a substitute for all-purpose flour. Remember, gluten-free dough may be more delicate, so handle it with care.
How do I store my decorated snowflake cookies?
To store your beautifully decorated snowflake cookies, place them in an airtight container once they are completely dry. This will keep them fresh and prevent the decorations from getting damaged.
Layering them with parchment paper between each row can prevent them from sticking to each other. Store them in a cool, dry place to maintain their quality.
Can I freeze snowflake cookies for later use?
Absolutely, you can freeze both the dough and the baked cookies. For the dough, wrap it tightly in plastic wrap and store it in a freezer bag. Thaw it in the refrigerator before using.
If you want to freeze baked cookies, place them in a single layer on a baking sheet and freeze them. Once frozen, transfer them to a freezer-safe container with parchment paper between each layer.
#snowflakes #dessert #dessertfood #sweetfood #recipe
Conclusion
Embracing snowflake recipes allows you to create intricate and delightful treats that capture the essence and beauty of winter. These recipes cater to various tastes and dietary needs, making them versatile and inclusive. The process itself is a fun and creative activity that can be shared with family and friends.
By following the tips and variations provided, you can ensure that your snowflake-themed creations are both stunning and delicious. Whether for a festive celebration or as a thoughtful gift, these unique treats are sure to impress. Enjoy the magical experience of transforming simple ingredients into beautiful works of edible art.